Introduction of Adobe PageMaker is a desktop publishing program first introduced in 1985 by a company called Aldus. It was initially made for Apple Macintosh computers and later, in 1987, for PCs using Windows 1.0. Introduction of Adobe PageMaker played a significant role in making both the Macintosh and Windows platforms popular because of its easy-to-use graphical interface. The latest version, PageMaker 7.0, came out on July 9, 2001.
Introduction of Adobe PageMaker People use PageMaker mainly for creating publications that need both text and graphics, such as magazines, newsletters, and brochures. Version 6.5 of PageMaker is particularly good at importing text and images from other software, as well as creating them directly within the program. It handles text better than Illustrator and PhotoShop and offers more graphic control than standard word processors.
NEW FEATURES IN PAGEMAKER 7.0
- Place native Adobe Photoshop 5.0-6.0x files.
- Expanded support for placing native illustrator files.
- Updated EPS filter.
- User interface for exporting Adobe PDF files.
- Create Tagged PDF support (eBooks)
- Create Data Merge effectively.
STARTING PAGEMAKER
- Click the Start button.
- Select Programs.
- From the Programs Menu select Adobe.
- In the Adobe Menu select PageMaker 6.5.
- Click adobe PageMaker 6.5.
- The PageMaker window is displayed.
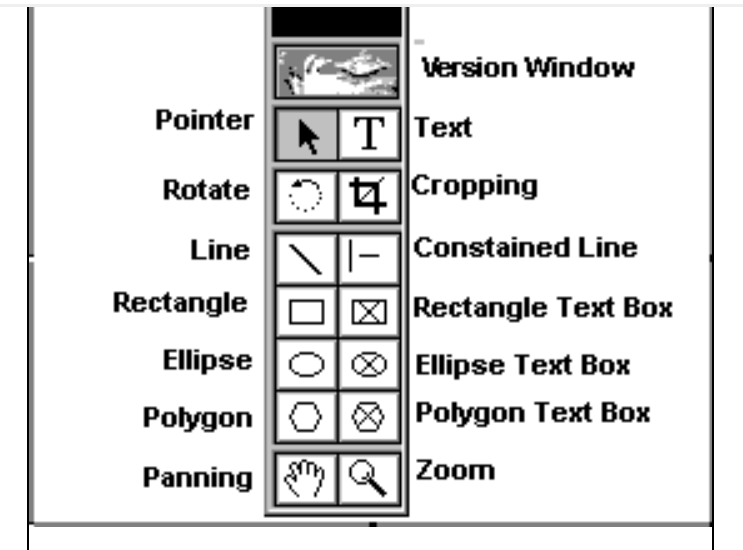
UNDERSTANDING PAGEMAKER TOOLS
INTRODUCTION OF ADOBE PAGEMAKER
POINTER TOOL
The pointer tool lets you select, move, and place images and text easily.
TEXT TOOL
Introduction of Adobe PageMaker The Text Tool in Adobe PageMaker lets you add and edit text in your document. Just click on the Text Tool, then click anywhere on the page to start typing. This will create a text box that can expand as you type more text.
INTRODUCTION OF ADOBE PAGEMAKERROTATE TOOL
The Rotate tool lets you turn text and graphics. To use it, click on the Rotate tool, then click on the object you want to rotate and drag to spin it around.
CROP TOOL
Introduction of Adobe PageMaker The Crop tool lets you cut out parts of imported pictures to get the size you want. It only works on TIFF images. To use it, click on the tool, then drag the edges of the picture to trim it down.
OBLIQUE LINE TOOL
To draw a slanted line, follow these simple steps:
- Select the Oblique Line Tool.
- Click where you want the line to start.
- Drag your mouse in the direction you want the line to go.
- Release the mouse button when the line is the length and angle you want.
CONSTRAINED LINE TOOL
The Constrained Line tool in Adobe PageMaker helps you draw straight lines easily. It lets you create lines that are perfectly horizontal, vertical, or at a 45-degree angle.
BOX TOOL
The Box Tool in Adobe PageMaker lets you draw a simple box shape on your page.
INTRODUCTION OF ADOBE PAGEMAKER RESTANGLE FRAME TOOL
A Rectangle Frame in Adobe PageMaker is like a box where you can put text. To use it, you first choose the Rectangle Frame tool and draw the box where you want your text to go. Then, select the text tool and click inside the box you drew. Now you can type your text, and it will stay neatly inside that box you created.
CIRCLE TOOL
Introduction of Adobe PageMaker the Circle Tool in Adobe PageMaker is what you use to create circles or ovals on your page. To draw one, just select the tool, click where you want the circle to start, and then drag to make the circle or oval the size you want.
CIRCULAR FRAME
The Circular Frame tool in Adobe PageMaker lets you create a circle or oval where you can type text that follows the shape of the circle. You draw the circular frame using this tool and then click inside it with the text tool to start typing. The text you type will stay within the boundaries of the circular frame you created.
POLYGON TOOL
The Polygon tool in Adobe PageMaker lets you draw shapes that have more than four sides. If you want to change the shape or adjust its appearance, you can select the shape, go to the ‘Element’ menu, and then choose ‘Polygon Settings’ to make your modifications.
POLYGON FRAME
To use a polygon frame in Adobe PageMaker, first, select the polygon frame tool. Draw the shape you want, like a triangle or square. Then, choose the text tool and click inside the shape you drew. This lets you type text that fits neatly inside the shape you made.
HAND TOOL
The Hand Tool in Adobe PageMaker lets you move around your document easily. It’s handy for large pages because you can click and drag to see different parts of the page without having to scroll. It helps you navigate smoothly through your work.
ZOOM TOOL
The Zoom Tool in Adobe PageMaker lets you get a closer look at your document or see more of it at once. Normally, it starts in Zoom-in mode, which makes things bigger. To make things smaller and see more of the page, just select the Zoom Tool, hold down the Control key, and click in the document window.
INTRODUCTION OF ADOBE PAGEMAKER FILE MENU TAB
At the top of Adobe PageMaker, you’ll see a bar with different categories like File, Edit, Layout, Type, Element, Utilities, View, Window, and Help. When you click on one of these categories (like “File” or “Edit”), a list of options related to that category will drop down. For example, under “File,” you’ll find options like saving your work or opening a new document. This menu bar helps you find and use different tools and commands in Adobe PageMaker.
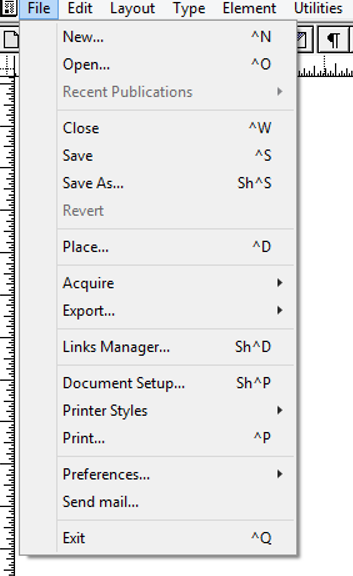
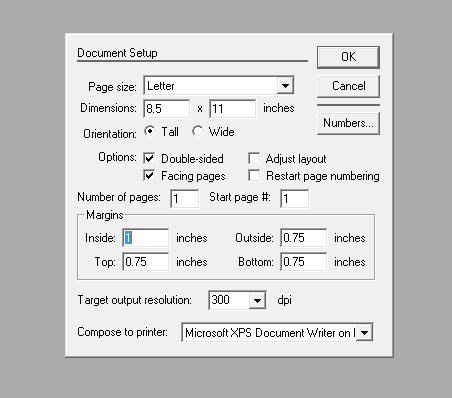
NEW
when you use the “New” command in Adobe PageMaker, it opens a window where you can set up all the details for your new document before you start working on it. This helps you get everything ready the way you want it before you begin creating your pages.
OPEN
When you open PageMaker, you can load a file you’ve already worked on before.
SAVE
To save your work in Adobe PageMaker, you can use the Save command. If you want to save all the files you have open at once, hold down the Shift key while choosing the Save option.
REVERT
“Revert” is like hitting undo on everything you’ve done since you last saved. It’s as if you closed your project without saving and then opened it again from scratch.
PLACE
“Place” command in Adobe PageMaker is how we add text and pictures into our project. It’s like putting puzzle pieces onto a board; we use this command to bring in all the elements we need to create our publication.

ACQUIRE
Acquire command in Adobe PageMaker lets you bring in images by scanning them directly into your document.
EXPORT
Export command in Adobe PageMaker allows you to save your documents in different file formats of your choice. It’s like choosing how you want to package and save your work so that you can use it in different ways or share it with others easily.
EDIT MENU
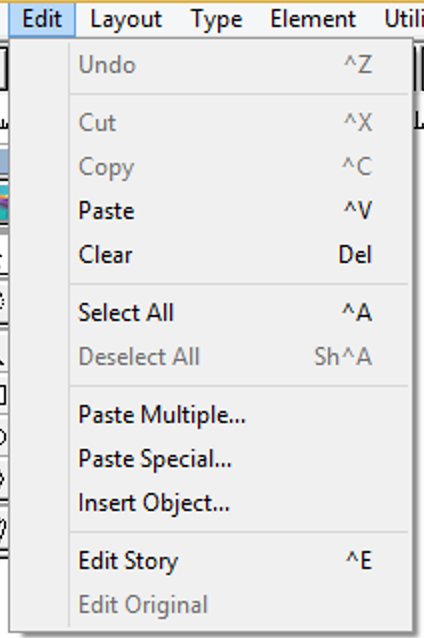
Paste Multiple:
Paste Multiple allows you to make and insert several copies of text or images at once.
Paste Special
Paste Special is a feature that lets you choose how you want an object to look when you paste it into your document.
Insert Object
Inserting an Object lets you choose how to add an embedded file, like a chart or image, directly into your PageMaker document. This means you can include different types of content from other programs into your PageMaker project.
Edit Story
Edit Story lets you switch between writing and editing text, and arranging your text on the page.
LAYOUT MENU
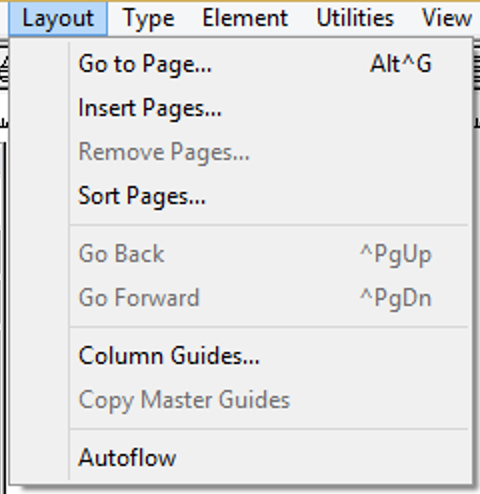
Sort Pages
When you choose the Sort Page option in Adobe PageMaker, a window pops up showing all the pages in your document. You can then easily drag and drop the pages to rearrange them in any order you like.
Column Guides
Column Guides help you split the pages of your document into equal sections, making it easier to organize your content.

Auto Flow
Auto Flow in Adobe PageMaker automatically fills the pages of your document with text from a loaded text icon. It moves the text from one column to the next and creates new pages as needed to fit all the text.
TYPE MENU
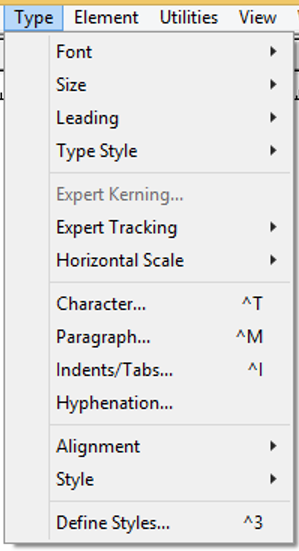
Hyphenation
Adobe PageMaker offers different ways to hyphenate words in justified text to make it look more evenly spaced. Here’s a simple explanation of the options:
- Manual Only: PageMaker will only hyphenate words where you have specifically added a hyphen.
- Manual plus Dictionary: In addition to the words you have manually hyphenated, PageMaker will also hyphenate words based on its built-in dictionary.
- Manual plus Algorithm: PageMaker uses a mathematical formula to hyphenate words, along with your manually inserted hyphens, to break words more effectively.
Define Styles
This option will show you a box where you can see all the text styles used in your document. You can use this box to add new styles, change existing ones, or remove styles you don’t need.
ELEMENT MENU
Frame
As an Adobe PageMaker expert with 10 years of experience, I’m well-versed in using features that let you align and position frames easily on your page. I can also help you adjust margins to make sure everything looks just right on your document.
Align Objects
In Adobe PageMaker, the Align Objects feature helps you position several objects in relation to each other, making sure they line up neatly on the page.
Masking Objects
Masking in Adobe PageMaker is like using a stencil. You place a shape (like a rectangle, circle, or any custom shape) over part of an object, and only the part of the object that fits within that shape will show. It’s a way to control which parts of an image or text are visible, almost like cropping with a specific pattern.
Link Options
Link Options in Adobe PageMaker decide if linked text or images should automatically update when you make changes to your document, and how often this updating happens.
UTILTIES MENU
Plug-ins
I’ve been using Adobe PageMaker for 10 years and know it inside out. I can help you with its various plug-ins, which are extra tools that come with PageMaker to add more features and options. These plug-ins make it easier to do different tasks, like creating special effects or handling specific types of files.
Drop caps
Drop caps are big letters at the beginning of paragraphs that grab your attention and guide you into reading the text. Here’s how you can use the drop cap feature in Adobe Pagemaker.
VIEW MENU
Display Master Items
Master Items Display: This feature lets you show or hide items that are on the master pages of your document. When you toggle this on, any elements like headers, footers, or logos that you’ve set up on the master page will appear on your actual document pages.
Display Non-Printing Items
Display Non-Printing Items: This feature shows or hides things on your document that won’t actually print, like guidelines or hidden text.
WINDOW MENU
Show Tools
In Adobe PageMaker, there’s a feature called “Hide/Show tools” that lets you hide or display the toolbar you use for editing and designing documents. It’s handy when you want to focus on your work without the distraction of the toolbar, or when you need to quickly access the tools again.
Show Control Palette
To show or hide the Control Panel in Adobe PageMaker, you can toggle its display on your screen using the “Show/Hide Control Panel” option
Show Colors
In Adobe PageMaker, the ‘Show/Hide Colors’ feature controls whether the Color Palette is visible on your screen or not.
Show Style
Show/Hide Styles lets you hide or show the Styles Palette on your screen.
Show Layers
In Adobe PageMaker, the ‘Show/Hide Layers’ option controls whether you can see the Layers Palette on your screen.
Show Master Pages
The Show/Hide Master Pages option lets you control whether the Master Pages menu is visible on your screen in Adobe PageMaker.
Show Hyperlinks
To see or hide the links in your document, click on ‘Show Hyperlinks’ to open or close the Hyperlink Palette.